-
Notifications
You must be signed in to change notification settings - Fork 0
/
Copy pathVisactorTableReactCustomDemo.txt
341 lines (273 loc) · 15.3 KB
/
VisactorTableReactCustomDemo.txt
1
2
3
4
5
6
7
8
9
10
11
12
13
14
15
16
17
18
19
20
21
22
23
24
25
26
27
28
29
30
31
32
33
34
35
36
37
38
39
40
41
42
43
44
45
46
47
48
49
50
51
52
53
54
55
56
57
58
59
60
61
62
63
64
65
66
67
68
69
70
71
72
73
74
75
76
77
78
79
80
81
82
83
84
85
86
87
88
89
90
91
92
93
94
95
96
97
98
99
100
101
102
103
104
105
106
107
108
109
110
111
112
113
114
115
116
117
118
119
120
121
122
123
124
125
126
127
128
129
130
131
132
133
134
135
136
137
138
139
140
141
142
143
144
145
146
147
148
149
150
151
152
153
154
155
156
157
158
159
160
161
162
163
164
165
166
167
168
169
170
171
172
173
174
175
176
177
178
179
180
181
182
183
184
185
186
187
188
189
190
191
192
193
194
195
196
197
198
199
200
201
202
203
204
205
206
207
208
209
210
211
212
213
214
215
216
217
218
219
220
221
222
223
224
225
226
227
228
229
230
231
232
233
234
235
236
237
238
239
240
241
242
243
244
245
246
247
248
249
250
251
252
253
254
255
256
257
258
259
260
261
262
263
264
265
266
267
268
269
270
271
272
273
274
275
276
277
278
279
280
281
282
283
284
285
286
287
288
289
290
291
292
293
294
295
296
297
298
299
300
301
302
303
304
305
306
307
308
309
310
311
312
313
314
315
316
317
318
319
320
321
322
323
324
325
326
327
328
329
330
331
332
333
334
335
336
337
338
339
340
341
Title: React Custom Component——VisActor/VTable tutorial documents
URL Source: https://visactor.io/vtable/guide/custom_define/react-custom-component
Markdown Content:
React-VTable custom components
------------------------------
Custom cell components
----------------------
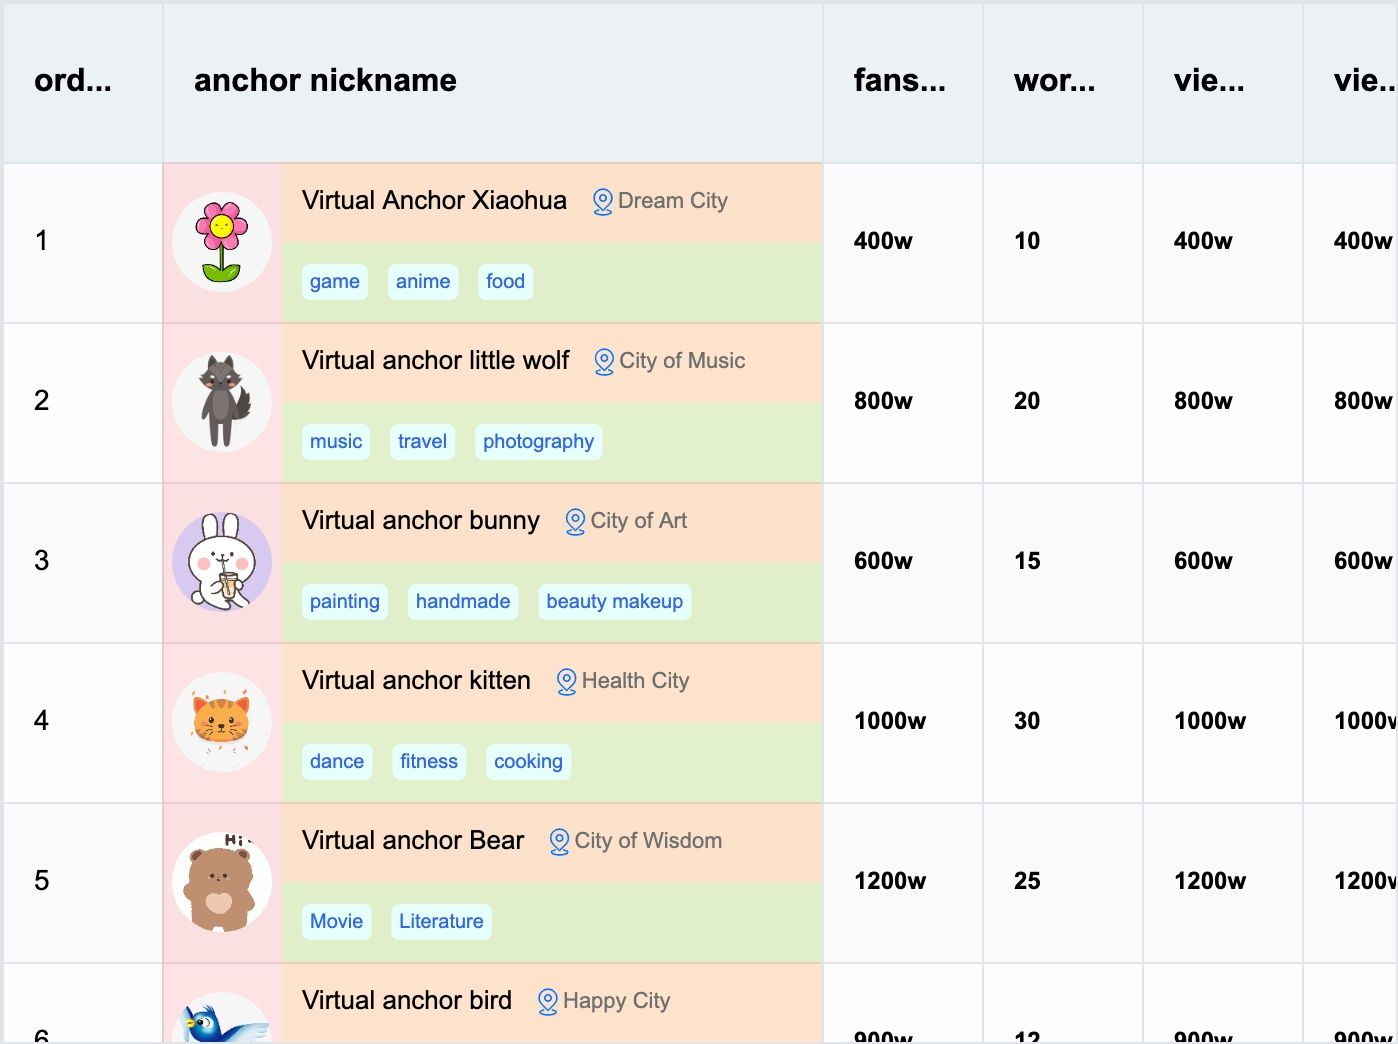
To help react developers quickly implement custom cell content, React-VTable provides the ability to encapsulate components and use them in cells.
### Component usage
_To use custom cell component, need to use react 18 version_
Custom cell components are encapsulated based on [custom layout](https://visactor.io/vtable/guide/custom_define/custom_layout), and their usage is similar to custom layout. To use components in `ListColumn`, custom components need to pass in the `role` attribute to identify the component as a custom cell component; the `custom-layout` component will take effect in the table content part, and the `header-custom-layout` component will take effect in the table header part. There can be at most one `custom-layout` component in each column, and at most one `header-custom-layout` component.
```
<ListTable records={records}>
<ListColumn field={'bloggerName'} title={'bloggerName'} width={330} disableHover={true}>
<CustomLayoutComponent role={'custom-layout'} info={bodyInfo}/>
<HeaderCustomLayoutComponent role={'header-custom-layout'} info={headerInfo}/>
</ListColumn>
// ......
</ListTable>
```
### Component encapsulation
#### Default properties
In the component, in addition to user-defined properties, like custom layouts, react-vtable also provides some default properties for components to use
```
interface CustomLayoutProps {
table: ListTable; // 表格实例
row: number; // 行号
col: number; // 列号
value: FieldData; // 单元格展示数据
dataValue: FieldData; // 单元格原始数据
rect?: RectProps; // 单元格布局信息
}
const CustomLayoutComponent = (props: CustomLayoutProps & UserProps) => {
const { table, row, col, rect, text } = props;
// ......
}
```
#### Label
The label returned by the component must be based on the element label provided by react-vtable (HTML tags or DOM react components cannot be used directly. If you need to use them, please refer to the next section)
```
import { Group, Text } from '@visactor/react-vtable';
const CustomLayoutComponent = (props: CustomLayoutFunctionArg & { text: string }) => {
const { table, row, col, rect, text } = props;
if (!table || row === undefined || col === undefined) {
return null;
}
const { height, width } = rect || table.getCellRect(col, row);
const [hover, setHover] = useState(false);
const fieldData = [
{
value: 'a',
label: 'a'
},
{
value: 'b',
label: 'b'
}
];
const groupRef = useRef(null);
return (
<Group
attribute={{
width,
height,
display: 'flex',
flexWrap: 'wrap',
alignItems: 'center',
alignContent: 'center'
}}
ref={groupRef}
>
{fieldData.map(item => {
return (
<Text
key={item.value}
attribute={{
text: `${text}-${row}`,
fill: hover ? 'red' : '#000'
}}
onMouseEnter={(event: any) => {
// eslint-disable-next-line no-console, no-undef
console.log('groupRef', groupRef.current);
setHover(true);
event.currentTarget.stage.renderNextFrame();
}}
onMouseLeave={(event: any) => {
setHover(false);
event.currentTarget.stage.renderNextFrame();
}}
/>
);
})}
{hover && (
<Text
attribute={{
text: 'hover',
fill: 'blue',
}}
/>
)}
</Group>
);
};
```
### Basic graphic component
Basic graphics:
* Text
* Rect
* Image
* Line
* Arc
* Circle
* Group
For specific configuration properties, please refer to [`VRender element configuration`](https://visactor.io/vrender/option/Group), and for specific usage and layout, please refer to [custom layout](https://visactor.io/vtable/guide/custom_define/custom_layout), [reference example](https://visactor.io/vtable/demo-react/component/cell-custom-layout-dom).
### React-VTable component
In order to facilitate users to quickly implement customized cell content, React-VTable provides some commonly used components in table scenarios:
#### Tag
API
| Property | Type | Description |
| --- | --- | --- |
| text | string | Text content |
| textStyle | [TextStyleOption](https://visactor.io/vrender/option/Text#attribute) | Text style |
| panelStyle | [RectStyleOption](https://visactor.io/vrender/option/Rect#attribute) | Label background style |
| padding | number | number\[\] | Padding |
| minWidth | number | Maximum width of label |
| maxWidth | number | Minimum width of label |
#### Radio
API
| Property | Type | Description |
| --- | --- | --- |
| text | string | Text content |
| textStyle | [TextStyleOption](https://visactor.io/vrender/option/Text#attribute) & {disableFill?: string} | Text style |
| circleStyle | [ArcStyleOption](https://visactor.io/vrender/option/Arc#attribute) & {disableFill?: string;checkedFill?: string;checkedStroke?: string;disableCheckedFill?: string;disableCheckedStroke?: string;} | Circular check icon style |
| interactive | boolean | Interactive |
| disabled | boolean | Disable radio button |
| checked | boolean | Checked |
| cursor | Cursor | cursor style |
| disableCursor | Cursor | Disable cursor style |
| spaceBetweenTextAndIcon | number | Icon text spacing |
| onChange | (checked: boolean) =\> void | Checked state change callback |
#### Checkbox
API
| Attributes | Type | Description | --- | --- | --- | | text | string | Text content | | textStyle | [TextStyleOption](https://visactor.io/vrender/option/Text#attribute) & {disableFill?: string} | text style | | boxStyle | [RectStyleOption](https://visactor.io/vrender/option/Rect#attribute) & {disableFill?: string;checkedFill?: string;checkedStroke?: string;disableCheckedFill?: string;disableCheckedStroke?: string;} | Check icon style | | iconStyle | [ImageStyleOption](https://visactor.io/vrender/option/Image#attribute) & {{checkIconImage?: string | HTMLImageElement | HTMLCanvasElement;indeterminateIconImage?: string | HTMLImageElement | HTMLCanvasElement;}} | Check icon background style| | interactive | boolean | Is it interactive?| | disabled | boolean | Is the radio button disabled?| | checked | boolean | Is it checked?| | indeterminate | boolean | Is the indeterminate state displayed? | | cursor | Cursor | cursor style| | disableCursor | Cursor | Cursor style when disabled| | spaceBetweenTextAndIcon | number | Icon text spacing| | onChange | (checked: boolean) =\> void | Selected state change callback |
#### Button
API
| Property | Type | Description |
| --- | --- | --- |
| textStyle | [TextStyleOption](https://visactor.io/vrender/option/Text#attribute) | Text style |
| panelStyle | [RectStyleOption](https://visactor.io/vrender/option/Rect#attribute) | Background style |
| padding | number | number\[\] | Padding |
| disabled | boolean | Disabled |
| cursor | Cursor | cursor style |
| minWidth | number | Minimum button width |
| maxWidth | number | Maximum button width |
| onClick | (event: MouseEvent) =\> void | Click event callback |
| state | {textStyle?: {hover?: [TextStyleOption](https://visactor.io/vrender/option/Text#attribute); disabled?: [TextStyleOption](https://visactor.io/vrender/option/Text#attribute);};panelStyle?: {hover?: [RectStyleOption](https://visactor.io/vrender/option/Rect#attribute);disabled?: [RectStyleOption](https://visactor.io/vrender/option/Rect#attribute);};} | State Style |
#### Link
API
| Property | Type | Description |
| --- | --- | --- |
| textStyle | [TextStyleOption](https://visactor.io/vrender/option/Text#attribute) | Text style |
| panelStyle | [RectStyleOption](https://visactor.io/vrender/option/Rect#attribute) | Background style |
| disabled | boolean | Disabled |
| cursor | Cursor | cursor style |
| minWidth | number | Minimum link width |
| maxWidth | number | Maximum link width |
| onClick | (event: MouseEvent) =\> void | Click event callback |
| state | {textStyle?: {hover?: [TextStyleOption](https://visactor.io/vrender/option/Text#attribute); disabled?: [TextStyleOption](https://visactor.io/vrender/option/Text#attribute);};panelStyle?: {hover?: [RectStyleOption](https://visactor.io/vrender/option/Rect#attribute);disabled?: [RectStyleOption](https://visactor.io/vrender/option/Rect#attribute);};} | Status style |
| icon | boolean | Whether to display the left icon |
| space | number | Spacing between icon and text |
| href | string | Link address |
#### Avatar
API
| Property | Type | Description |
| --- | --- | --- |
| textStyle | [TextStyleOption](https://visactor.io/vrender/option/Text#attribute) | Text style |
| panelStyle | [RectStyleOption](https://visactor.io/vrender/option/Rect#attribute) | Background style |
| size | number | Size |
| shape | 'circle' | 'square' | Shape |
| autoFixFontSize | boolean | Whether to automatically adjust the font size |
| onClick | (event: MouseEvent) =\> void | Click event callback |
#### Popover
It should be noted that the `Popover` component uses the DOM solution, and `ReactDom` needs to be passed in the `ReactDOM` attribute, otherwise it cannot be rendered normally; the `ReactNode` type received by the `content` attribute needs to be a DOM tag or component, otherwise it cannot be rendered normally.
API
| Property | Type | Description |
| --- | --- | --- |
| defaultPopupVisible | boolean | Whether to display the bubble card by default |
| popupVisible | boolean | Whether to display the bubble card |
| position | 'top' | 'tl' | 'tr' | 'bottom' | 'bl' | 'br' | 'left' | 'lt' | 'lb' | 'right' | 'rt' | 'rb' | Bubble card position |
| content | ReactNode | Bubble card content (DOM tag or component) |
The React-VTable component library is being continuously enriched. Developers are welcome to encapsulate new components during use and build a component library ecosystem together.
#### Use DOM react components
If you need to use DOM react components in components, you can specify the `react` attribute in the `attribute` property of the element component and pass the react component as the `element` property:
```
<Group
attribute={{
// ......
react: {
pointerEvents: true,
container: table.bodyDomContainer, // table.headerDomContainer
anchorType: 'bottom-right',
element: <CardInfo record={record} hover={hover} row={row} />
}
}}
onMouseEnter={(event) => {
setHover(true);
event.currentTarget.stage.renderNextFrame();
}}
onMouseLeave={(event) => {
setHover(false);
event.currentTarget.stage.renderNextFrame();
}}
>
// ...
</Group>
```
The following properties are also supported in react:
* `pointerEvents` whether to respond to mouse events
* `penetrateEventList` Mouse event penetration list, used to specify which mouse events need to be penetrated to the VTable (currently only supports `wheel`)
* `container` Container, used to limit the component display area in the table when scrolling. If you need to limit the component display in the table content area, you need to specify it as `table.bodyDomContainer`; if you need to limit the component display in the table header area, you need to specify it as `table.headerDomContainer`; if it is a pop-up window or menu component, you do not need to configure this property
* `anchorType` Anchor type, used to specify the anchor position of the upper left corner of the component relative to the cell
* 'top'
* 'bottom'
* 'left'
* 'right'
* 'top-right'
* 'top-left'
* 'bottom-right'
* 'bottom-left'
* 'center'
We recommend that users use the meta tags provided by react-vtable for the content displayed in the cell. For pop-ups, menus and other components triggered in the cell, you can use DOM react components. This is the best performance solution. [Reference example](https://visactor.io/vtable/demo-react/component/cell-custom-component).
If you need to display content in a cell, use DOM react components. You need to specify `react.container` according to the restrictions on components displayed in the table content area. It should be noted that this method requires frequent updates of component-related DOM, which will have a certain impact on performance. You can refer to [custom layout](https://visactor.io/vtable/guide/custom_define/custom_layout). We strongly recommend that the content components in the cell use the meta tags provided by react-vtable, which is the best solution for performance.
Custom external components
--------------------------
In order to facilitate the overlay of external components on the React-VTable component, React-VTable provides the `CustomComponent` tool component, which allows you to quickly locate external components in the table, and can be used to quickly implement functional components such as pop-ups and menus.
```
<ListTable option={option} onMouseEnterCell={updatePos} onMouseLeaveTable={hide} onReady={ready}>
<CustomComponent width="50%" height="100%" displayMode="cell" col={col} row={row} anchor="bottom-right" dx="-50%">
<UserComponent value={value} />
</CustomComponent>
</ListTable>
```
Among them, `CustomComponent` is used as a container to position in the table and automatically match the size (based on the anchored cell). There are two specific ways to use it:
* Absolute positioning
For absolute positioning, you need to specify `displayMode` as `position`, and you need to specify `x` and `y` attributes to position the container to the specified pixel position in the table (based on the upper left corner). The `width` and `height` attributes specify the pixel size of the container.
* Relative positioning
For relative positioning, you need to specify `displayMode` as `cell`, the container is positioned relative to the cell, the `col` and `row` attributes are used to specify the anchored cell coordinates, the `anchor` attribute specifies the anchor position of the container relative to the cell, the `dx` and `dy` attributes specify the offset of the container relative to the anchored cell, and the `width` and `height` attributes specify the size of the container. The `dx` `dy` `width` and `height` attributes all support units of pixels or percentages. When the percentage is calculated relative to the size of the cell.
### API
```
interface CustomComponentProps {
children: React.ReactNode;
displayMode: 'position' | 'cell'; // Positioning mode
col?: number; // Anchored column coordinates
row?: number; // Anchored row coordinates
anchor?:
| 'top-left'
| 'top-center'
| 'top-right'
| 'middle-left'
| 'middle-center'
| 'middle-right'
| 'bottom-left'
| 'bottom-center'
| 'bottom-right'; // Anchored position
dx?: number | string; // x-direction offset
dy?: number | string; // y-direction offset
width?: number | string; // container width
height?: number | string; // container height
}
```
Custom external component demo: [custom component demo](https://visactor.io/vtable/demo-react/component/custom-component)