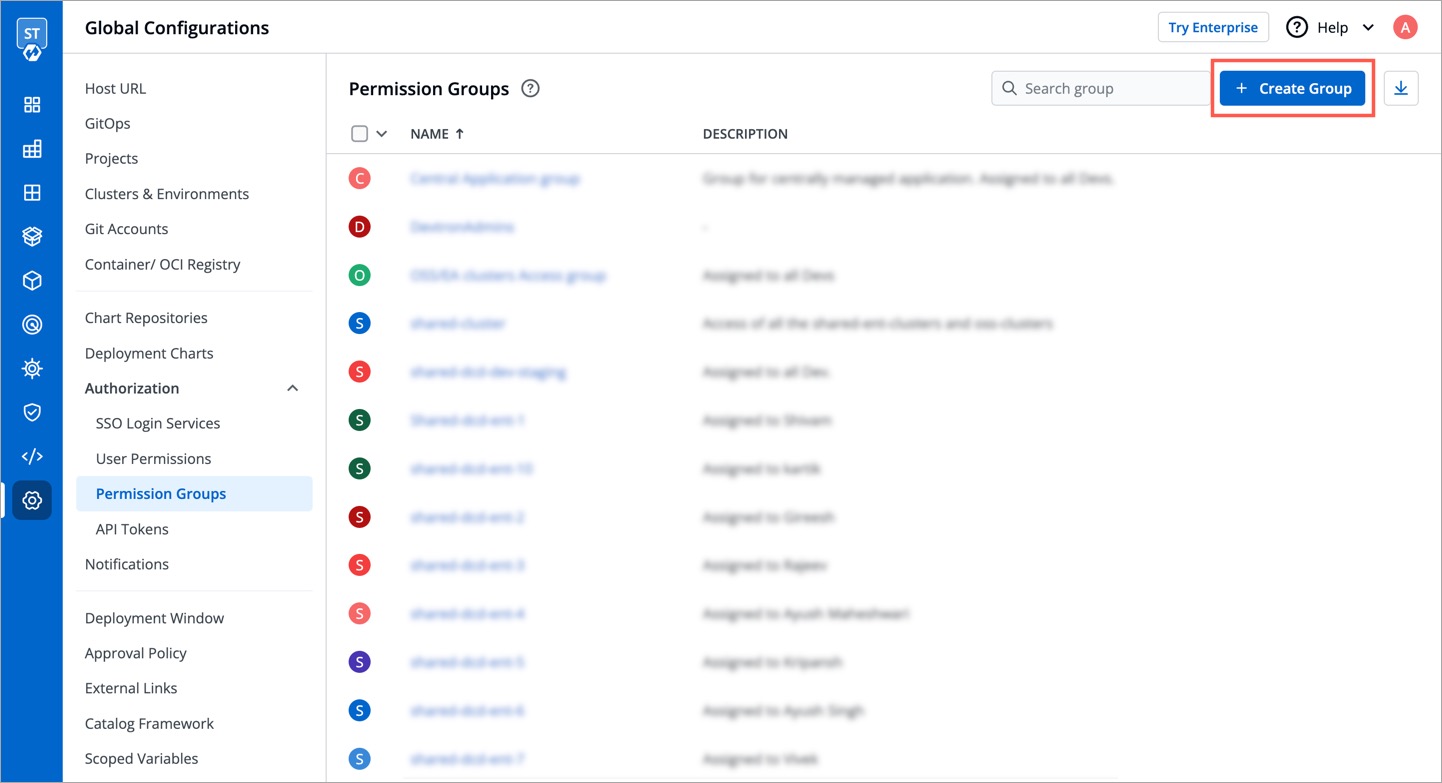
Using the Permission groups, you can assign a user to a particular group and a user inherits all the permissions granted to the group.
The advantage of the Permission groups is to define a set of privileges like create, edit, or delete for the given set of resources that can be shared among the users within the group.
{% hint style="info" %}
The User permissions section for Specific permissions contains a drop-down list of all existing groups for which a user has an access. This is an optional field and more than one groups can be selected for a user.
{% endhint %}
Go to Global Configurations → Authorization → Permissions groups → Add group.
Enter the Group Name and Description.
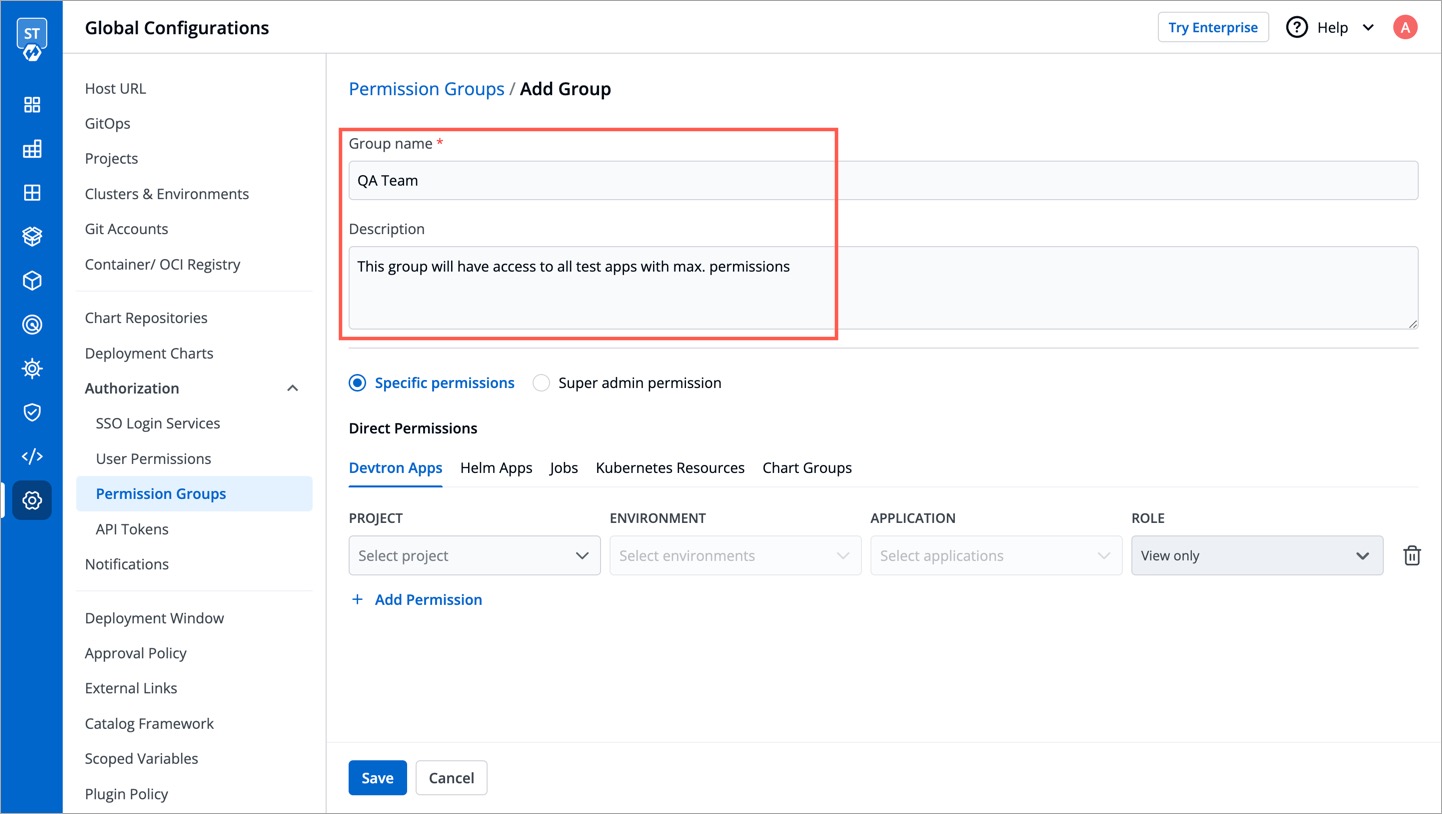
You can either grant super-admin permission to a user group or specific permissions to manage access for:
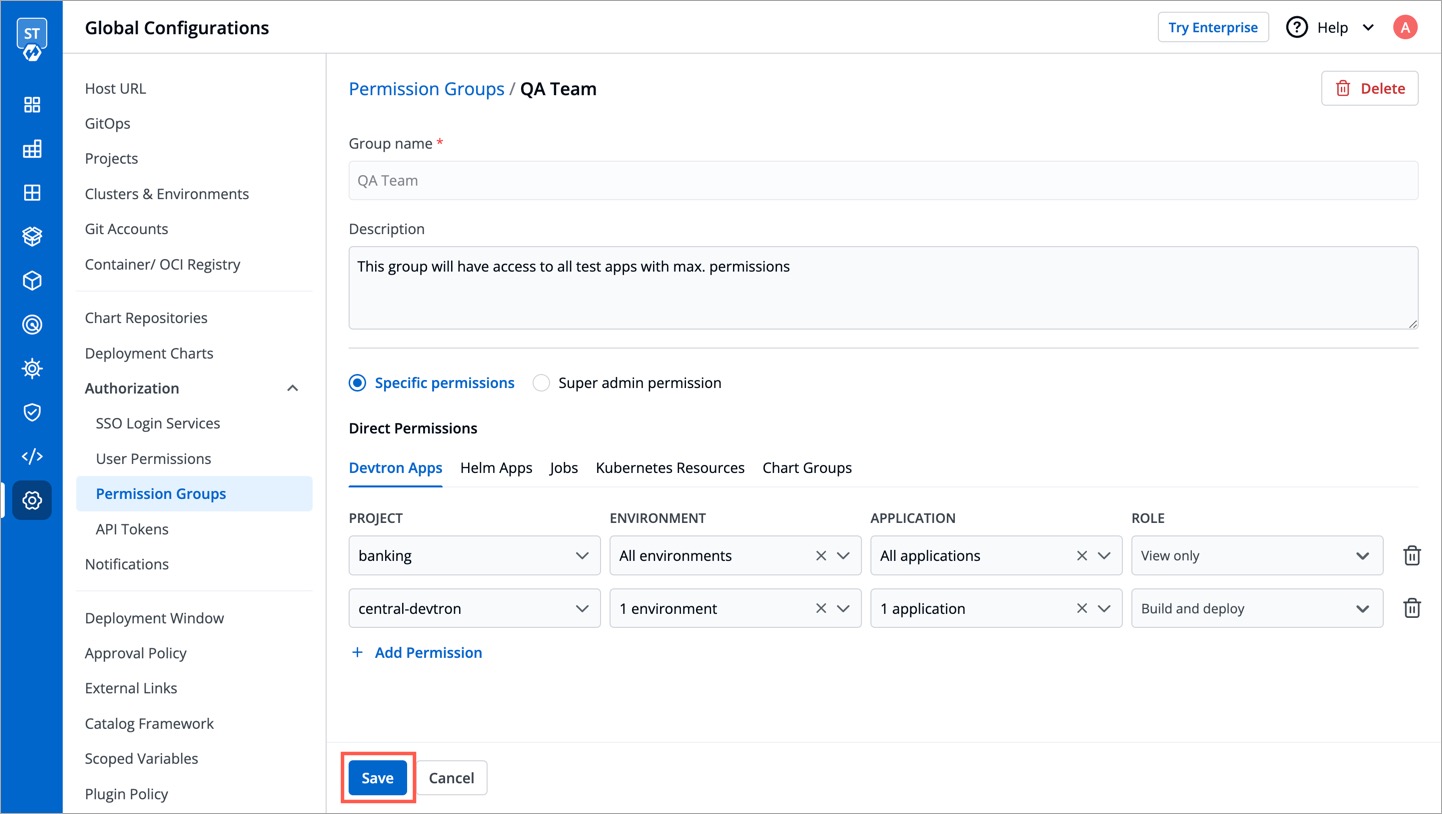
In Devtron Apps option, you can provide access to a group to manage permission for custom apps created using Devtron.
{% hint style="info" %}
The Devtron Apps option will be available only if you install CI/CD integration.
{% endhint %}
Provide the information in the following fields:

| Dropdown | Description |
|---|---|
| Project | Select a project from the drop-down list to which you want to give permission to the group. You can select only one project at a time. Note: If you want to select more than one project, then click Add row. |
| Environment | Select the specific environment or all environments from the drop-down list. Note: If you select All environments option, then a user gets access to all the current environments including any new environment which gets associated with the application later. |
| Application | Select the specific applications or all applications from the drop-down list corresponding to your selected Environments. Note: If you select All applications option, then a user gets access to all the current applications including any new application which gets associated with the project later. |
| Role | Select one of the roles to which you want to give permission to the user:
|
You can add multiple rows for Devtron Apps permission.
Once you have finished assigning the appropriate permissions for the groups, Click Save.
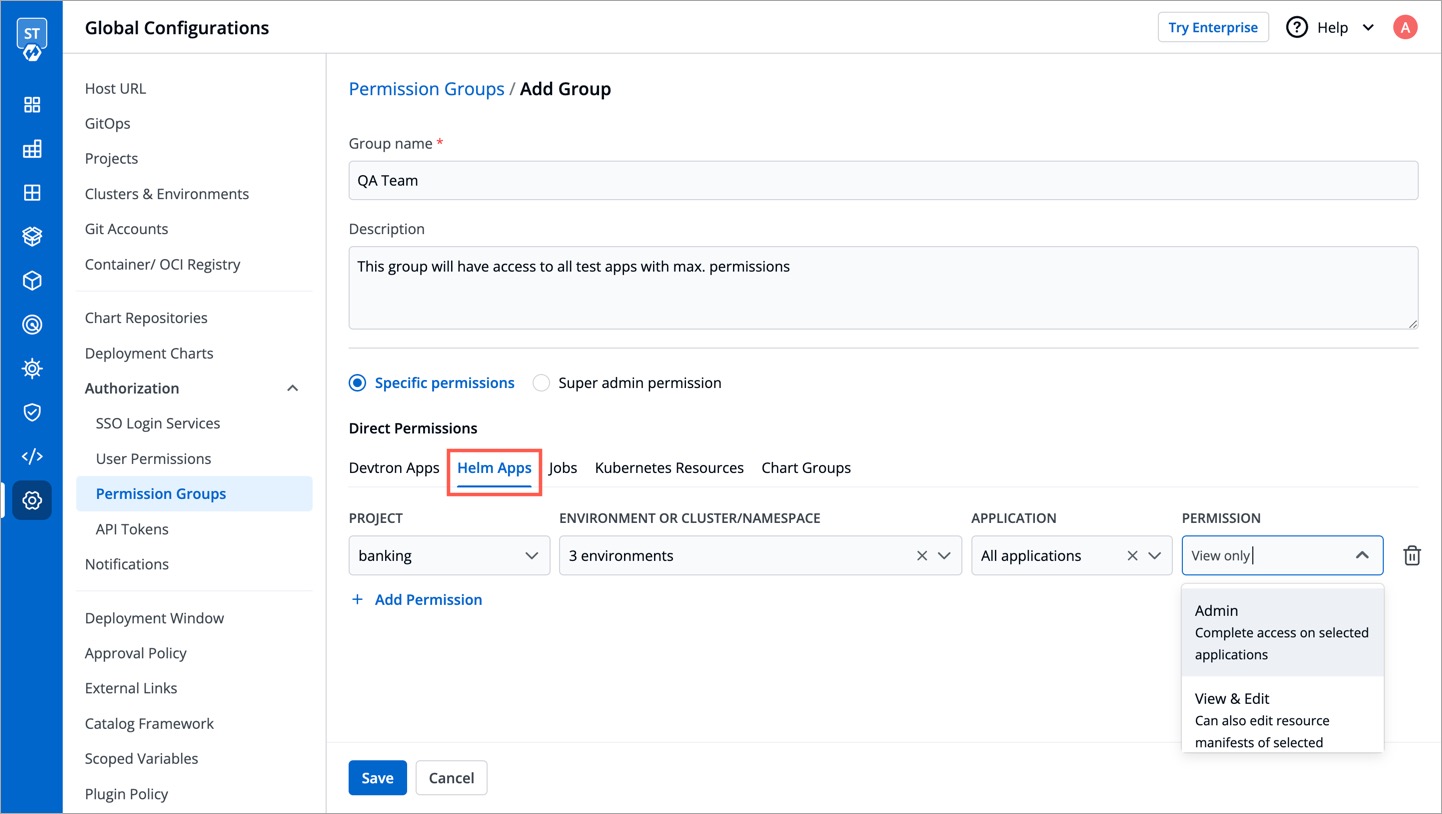
In Helm Apps option, you can provide access to a group to manage permission for Helm apps deployed from Devtron or outside Devtron.
Provide the information in the following fields:
| Dropdown | Description |
|---|---|
| Project | Select a project from the drop-down list to which you want to give permission to the group. You can select only one project at a time. Note: If you want to select more than one project, then click Add row. |
| Environment or cluster/namespace | Select the specific environment or all existing environments in default cluster from the drop-down list.Note: If you select all existing + future environments in default cluster option, then a user gets access to all the current environments including any new environment which gets associated with the application later. |
| Application | Select the specific application or all applications from the drop-down list corresponding to your selected Environments. Note: If All applications option is selected, then a user gets access to all the current applications including any new application which gets associated with the project later. |
| Role | Select one of the roles to which you want to give permission to the user:
|
You can add multiple rows for Devtron app permission.
Once you have finished assigning the appropriate permissions for the groups, Click Save.
In Jobs option, you can provide access to a group to manage permission for jobs created using Devtron.
Provide the information in the following fields:

| Dropdown | Description |
|---|---|
| Project | Select a project from the drop-down list to which you want to give permission to the group. You can select only one project at a time. Note: If you want to select more than one project, then click Add row. |
| Job Name | Select the specific job name or all jobs from the drop-down list. Note: If you select All Jobs option, then the user gets access to all the current jobs including any new job which gets associated with the project later. |
| Workflow | Select the specific workflow or all workflows from the drop-down list. Note: If you select All Workflows option, then the user gets access to all the current workflows including any new workflow which gets associated with the project later. |
| Environment | Select the specific environment or all environments from the drop-down list. Note: If you select All environments option, then the user gets access to all the current environments including any new environment which gets associated with the project later. |
| Role | Select one of the roles to which you want to give permission to the user:
|
You can add multiple rows for Jobs permission.
Once you have finished assigning the appropriate permissions for the groups, Click Save.
In Kubernetes Resources option, you can provide permission to view, inspect, manage, and delete resources in your clusters from Kubernetes Resource Browser page in Devtron. You can also create resources from the Kubernetes Resource Browser page.
{% hint style="info" %}
Only super admin users will be able to see Kubernetes Resources tab and provide permission to other users to access Resource Browser.
{% endhint %}
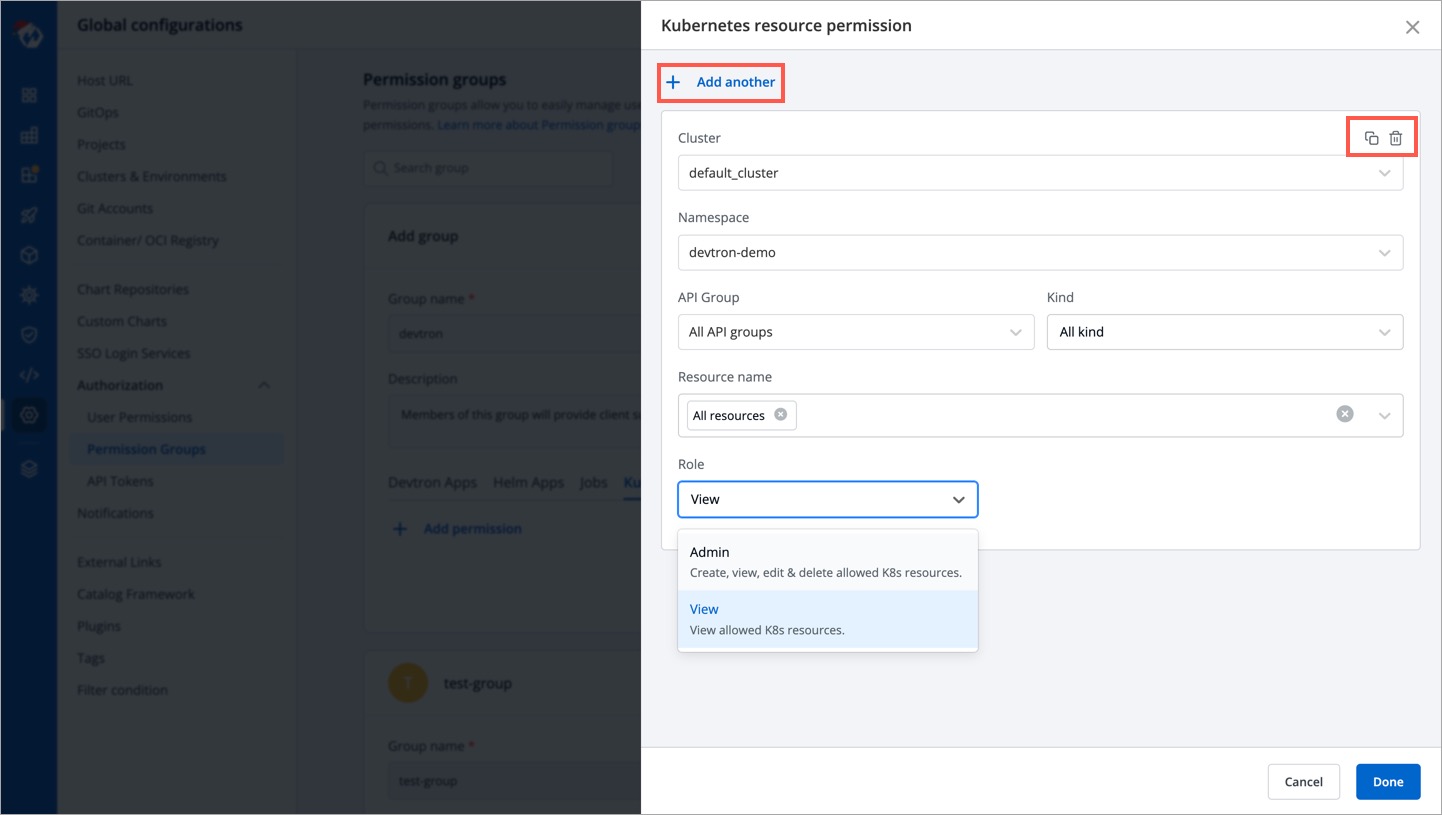
To provide Kubernetes resource permission, click Add permission.

On the Kubernetes resource permission, provide the information in the following fields:
| Dropdown | Description |
|---|---|
| Cluster | Select a cluster from the drop-down list to which you want to give permission to the user. You can select only one cluster at a time. Note: To add another cluster, then click Add another. |
| Namespace | Select the namespace from the drop-down list. |
| API Group | Select the specific API group or All API groups from the drop-down list corresponding to the K8s resource. |
| Kind | Select the kind or All kind from the drop-down list corresponding to the K8s resource. |
| Resource name | Select the resource name or All resources from the drop-down list to which you want to give permission to the user. |
| Role | Select one of the roles to which you want to give permission to the user and click Done:
|
You can add multiple rows for Kubernetes resource permission.
Once you have finished assigning the appropriate permissions for the groups, Click Save.
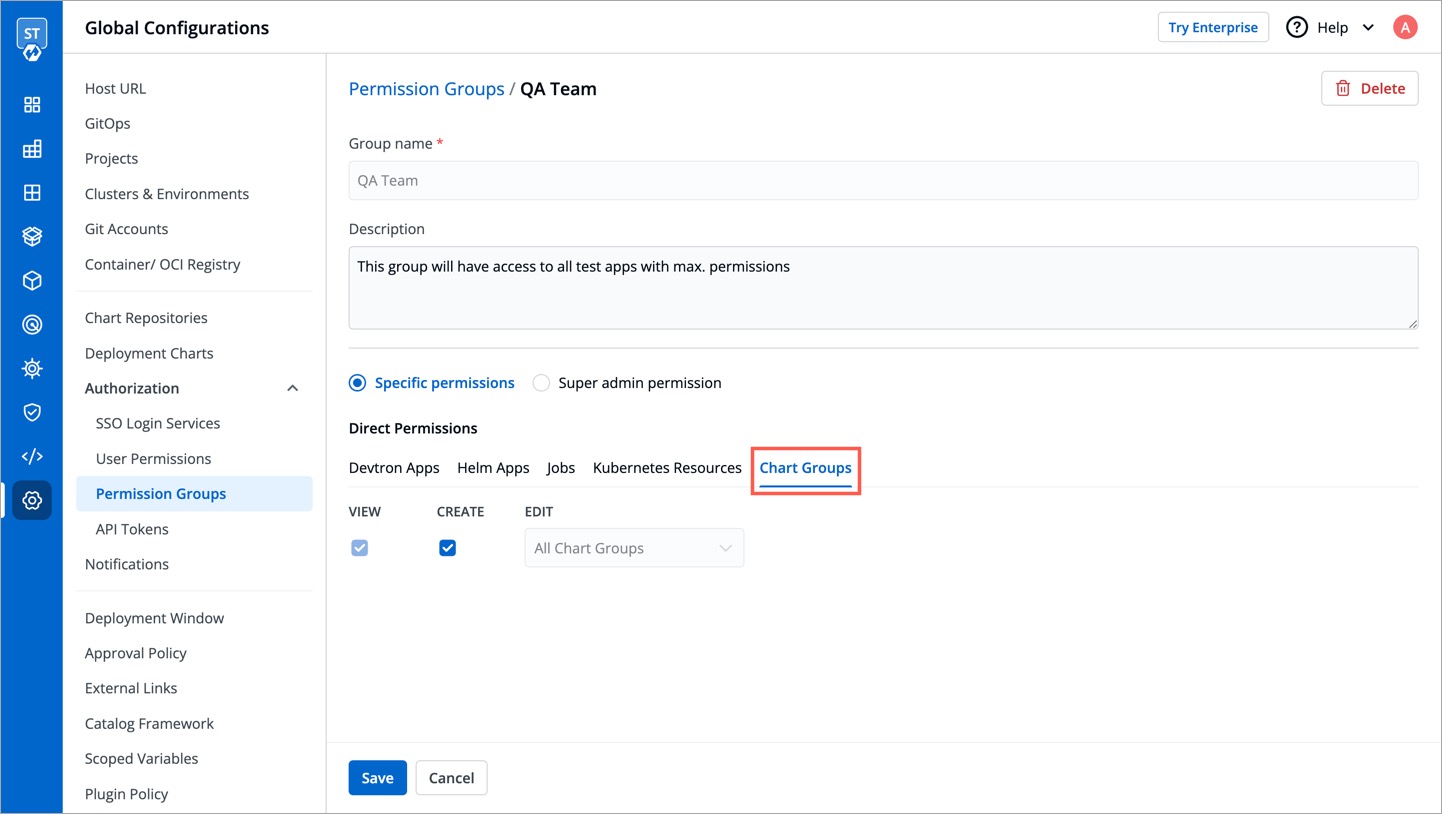
In Chart group permission option, you can manage the access of groups for Chart Groups in your project.
{% hint style="info" %}
The Chart group permission option will be available only if you install CI/CD integration.
{% endhint %}
{% hint style="info" %}
You can only give users the ability to create or edit, not both.
{% endhint %}
| Action | Permissions |
|---|---|
| View | Enable View to view chart groups only. |
| Create | Enable Create if you want the users to create, view, edit or delete the chart groups. |
| Edit |
|
Click Save once you have configured all the required permissions for the groups.
You can edit the permission groups by clicking the downward arrow.
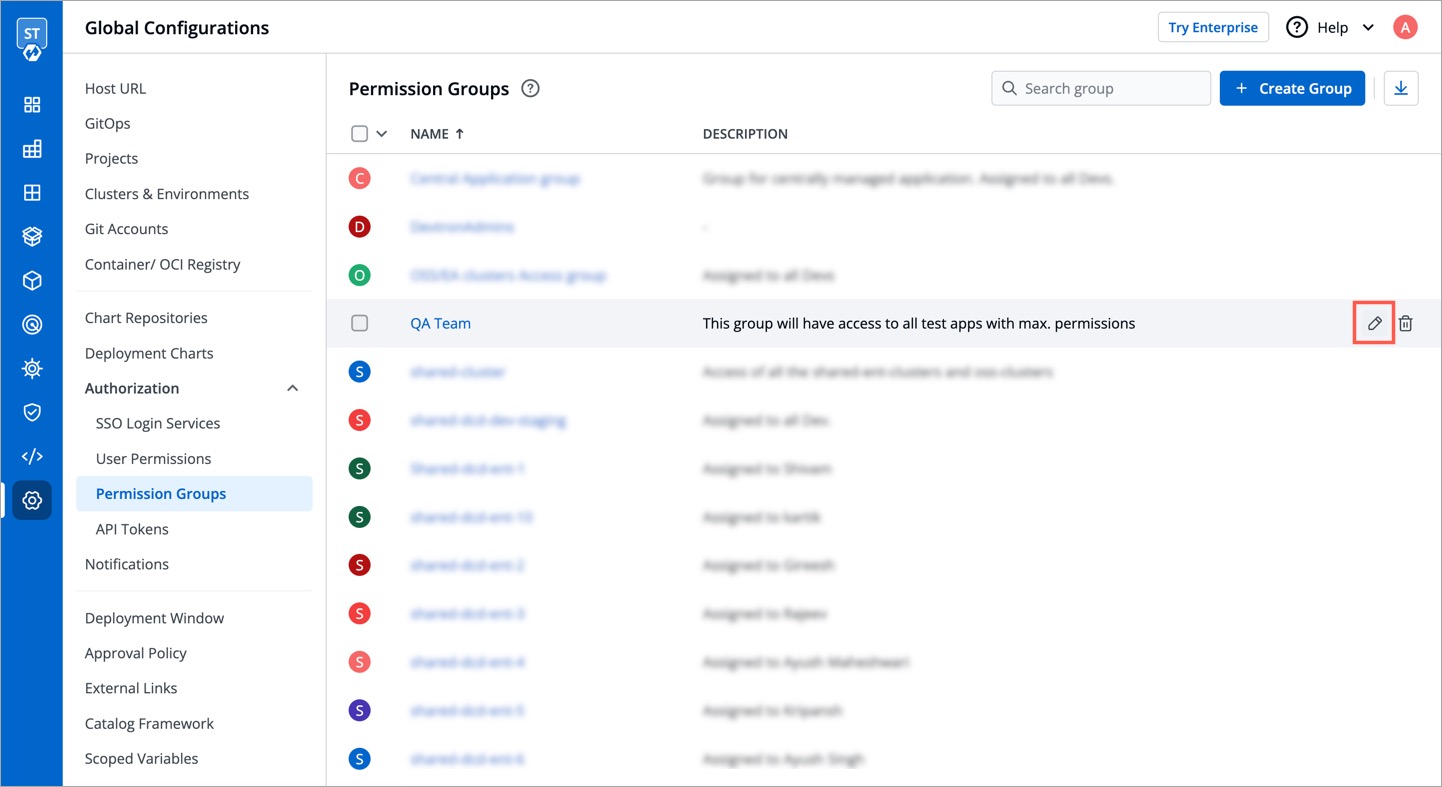
Edit the permission group.
Once you are done editing the permission group, click Save.
If you want to delete the groups with particular permission group, click Delete.