Creating your first Py93 package
This tutorial will guide you through the process of creating a Brython package and making it installable via Py93's Package manager.
Package author:
- Creates a Git repository on GitHub or somewhere else
- Makes a Python 3 package
- Makes a
.brython.jspackage file - Makes a JSON package file
- Shares a link to a service that serves raw JSON package file with proper
Content-Typeheader (raw.githack.com, for example)
Someone who wants to use a package:
- Installs Py93 if someone who wants to use a package doesn't have it installed on his Windows 93 PC
- Writes
py93 pm a <raw JSON package file URL>to Windows 93 terminal - Makes a Python 3 script
- Compiles it with py93compile
- Runs it
In this tutorial I will be using:
- GitHub as hosting for my Git repository when I will host my package
-
GitHack as a service that will be serving my JSON package file and
.brython.jspackage file - Visual Studio Code as a code editor
- GitHub Desktop as a thing that I will use for managing my Git repository
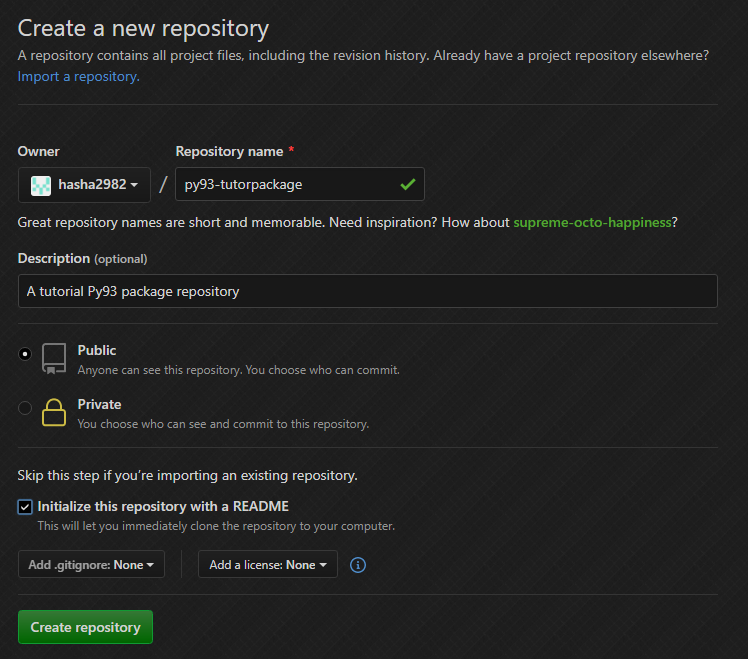
So, let's create a GitHub repository!
I will call my repository "py93-tutorpackage"
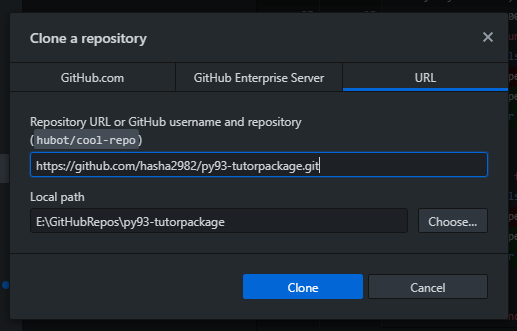
Then, I need to clone my repository to computer.
And then, I need to open the cloned repository in Visual Studio Code.
After we finished these 3 steps, we're now ready to go.
I will create folder named "source".
"source" would be our working directory for now.
I will create file __init__.py and write these contents inside it:
class Person:
    def __init__(self, name, age):
        self.name = name
        self.age = age

    def hello(self, personName):
        print("{0}: Hello, {1}!".format(self.name, personName))

    def whoami(self):
        print("{0}: Hi everyone, I am {0} and my age is {1}".format(self.name, self.age))
And I will create another file named hello.py and write these contents inside it:
def hello(something):
print('Hello, {0}!'.format(something))Now it's time to create a Brython package!
This step have a requirement: you need to have installed Python 3 module brython.
If you don't have it installed, go ahead and install Brython. If don't even have Python 3 installed, install it and come back.
So if you have brython and Python 3 installed, then open your terminal/command line on your real machine, (important!) cd into the "source" folder (or to any folder where you have your .py files), and write this to the terminal:
python -m brython --make_package <package-name>
I will use this:
python -m brython --make_package py93tutorpackage
Note: I use "py93tutorpackage" as package name because symbols like "-" will cause
SyntaxErrorwhile importing.
And I have file named py93tutorpackage.brython.js in "source".
Move it to root of directory.
So, when we now have .brython.js package file, we can test it out!
Put package file to /a/Py93/packages/ and then launch a shell using by writing this to Windows 93 terminal:
py93 s
Then, import your package and test it!
When you tested it out, commit and push your changes.
To make your package installable via Py93 Package manager, you need to create JSON package file. It contains metadata about your package and links for loading it.
Here's a list what you can put into your JSON package file:
Items that are marked with * are required.
-
version* - Number, version of JSON package file syntax. Currently there's only one version, and it is1. -
meta* - Object with metadata about package.-
title* - String, title of the package. -
author- String, nickname, name, etc. of this package author -
dispVer- String, version for displaying. -
compVer* - Number, package manager usescompVerfor comparing versions. -
license- String, name of the license that this package is licensed under. -
packageSite- String, you can put URL to your GitHub repository inpackageSite
-
-
install* - Object with data for installing.-
self- String, link to a service that serves this package file with properContent-Typeheader. Ifselfexists, then user can upgrade package usingpy93 pm upgrade [PACKAGE-NAME] -
package* - String, link to a service that serves.brython.jspackage file with properContent-Typeheader.
-
Here's an example of full JSON package file:
{
    "version": 1,
    "meta": {
        "title": "py93-tutorpackage",
        "author": "hasha2982",
        "dispVer": "v1.0.0",
        "compVer": 1,
        "license": "WTFPL",
        "packageSite": "https://github.com/hasha2982/py93-tutorpackage"
    },
    "install": {
        "self": "https://raw.githack.com/hasha2982/py93-tutorpackage/master/package.json",
        "package": "https://rawcdn.githack.com/hasha2982/py93-tutorpackage/f6065931c3116080111e0fd9a203d6494db49367/py93tutorpackage.brython.js"
    }
}
And an example of JSON package file that haves only required elements:
{
    "version": 1,
    "meta": {
        "title": "py93-tutorpackage",
        "compVer": 1
    },
    "install": {
        "package": "https://rawcdn.githack.com/hasha2982/py93-tutorpackage/f6065931c3116080111e0fd9a203d6494db49367/py93tutorpackage.brython.js"
    }
}
Note: Please use
$py93.sdk.validatePackageJSONbefore pushing JSON package file to repository. Documentation on$py93.sdk.validatePackageJSONcan be found here.Another note: If you are using GitHack, then use rawcdn for
packageand raw forself. Why? Because raw serves latest available version of a file, and rawcdn serves only specific version of a file.For example: latest version of your package is v2, but v1 is available too. User wants to install v1, but if you will use raw for
package, user will install package JSON file v1, but v2 will be loaded, because this is the latest available version.And if raw will be used for
self, thenpy93 pm u [PACKAGE-NAME]will get URL fromself, send a request, get the latest available version of JSON package file, and if a newer version if available, then it will upgrade the package.
Once you have your JSON package file, commit and push it.
Now go to your repository on GitHub, view JSON package file, copy the URL of JSON package file (it should look like this: https://github.com/hasha2982/py93-tutorpackage/blob/master/package.json) now go to raw.githack.com, paste the URL into the upper text input line.
It should look like that:
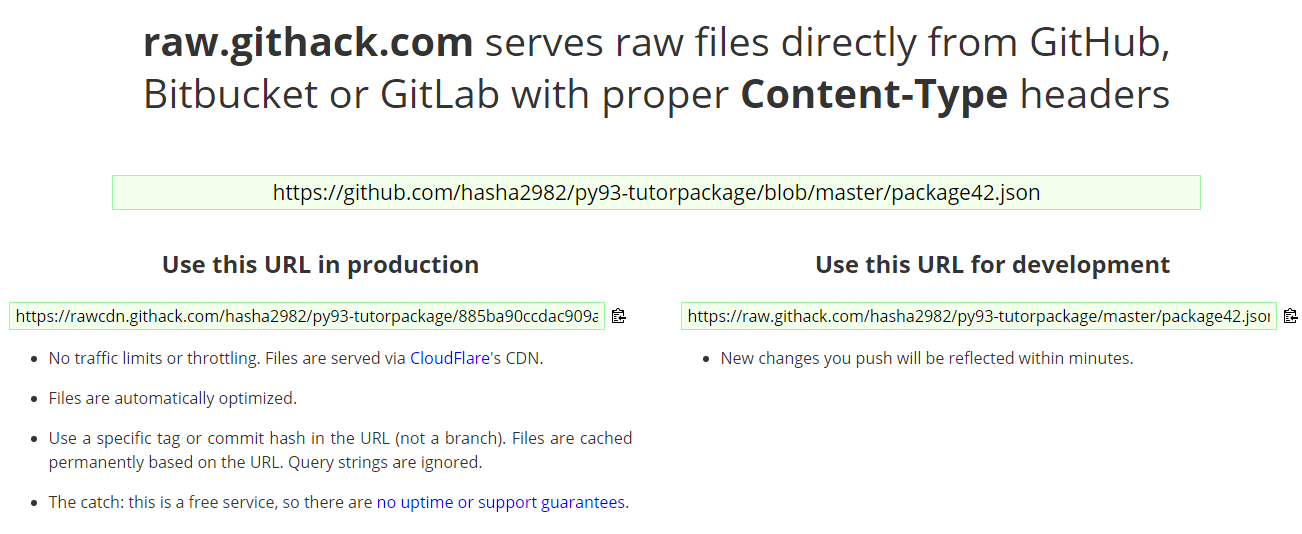
Then, you can put the one of URLs in your repository's README.