- Launch an EC2 instance.
- Install the dependencies required to run the React app.
- Create a React app and deploy it on the server for both the development and production environments.
Firstly, log in to the AWS management console.

After login, navigate to the search bar, type EC2, and select EC2

Now, the EC2 dashboard will appear. Click Instances

Click the Launch instances button.

To launch an EC2 instance, a few details are required, i.e., instance name, OS image (AMI), instance type, etc.


Select a key pair to attach with the instance to log in with that key. If you do not have key pair, then create a new key pair by clicking Create a new key pair. Moreover, according to usage, download key pair in .pem or .ppk format.

Now, to allow traffic from the internet, we need to create a rule in network settings.

We are good to go to launch an instance for this. Click the Launch instance button. If everything is correctly set up, you will find a success message on the screen. Click on the instance id to navigate to the EC2 dashboard.

Now, take the public IP from the EC2 dashboard and use it to login inside the instance using ssh. First move to the directory where the key is downloaded. In my case it's in downloads directory.

Finally, it will be logged in successfully if everything is configured correctly.
First, we need to install nodejs. npm comes with nodejs bundled. For nodejs, use below commands:
curl -fsSL https://deb.nodesource.com/setup_18.x | sudo -E bash -
sudo apt-get install -y nodejs


To check nodejs is successfully installed or not use node -v

Also, npm is already installed.

As you can see npm version is 8.13.2 but latest version is 8.14.0 so we have to update npm version using sudo npm install -g [email protected]

Step-3: Create a React app and deploy it on the server for both the development and production environments.
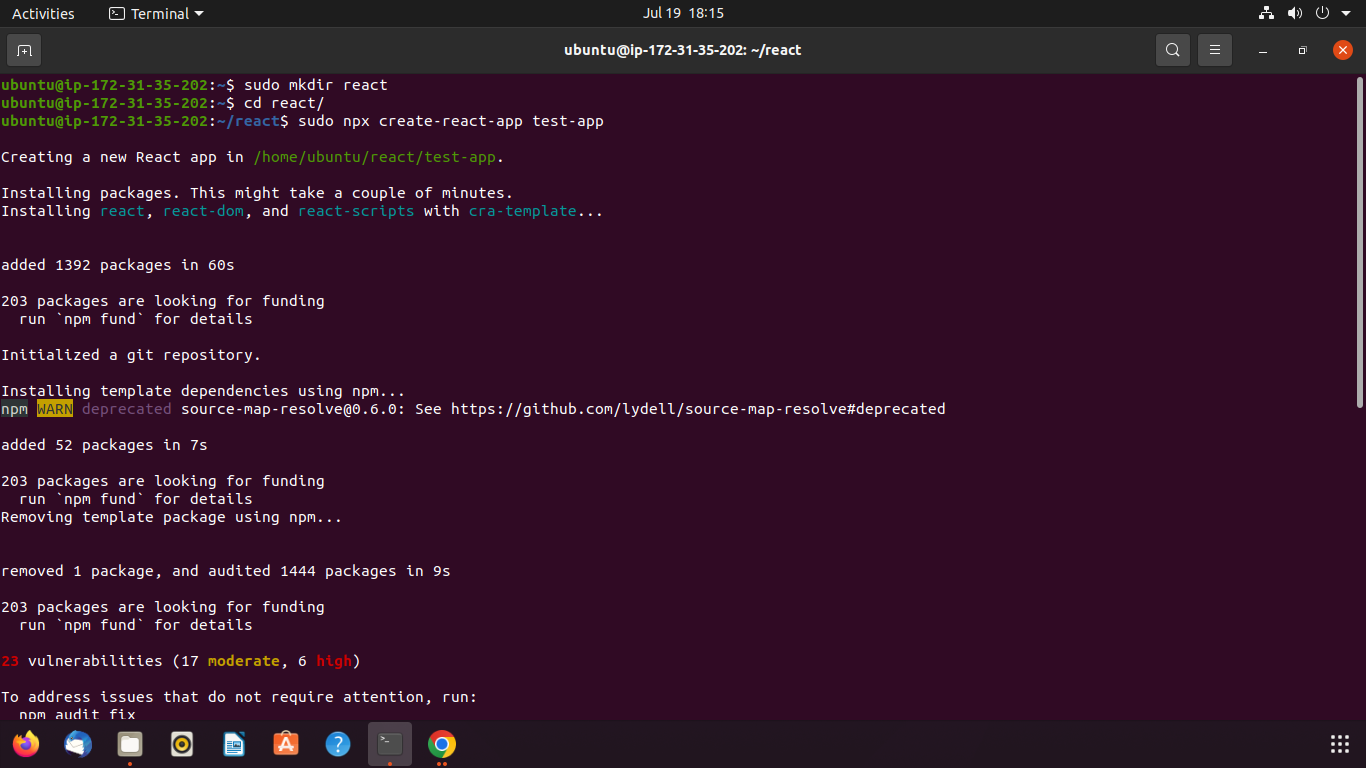
Now, time to create a react app
But before this create a directory with any name then move to that directory after this run sudo npx create-react-app <APP_NAME>
If we run command from /home/ubuntu/ then might get error of permission denied.

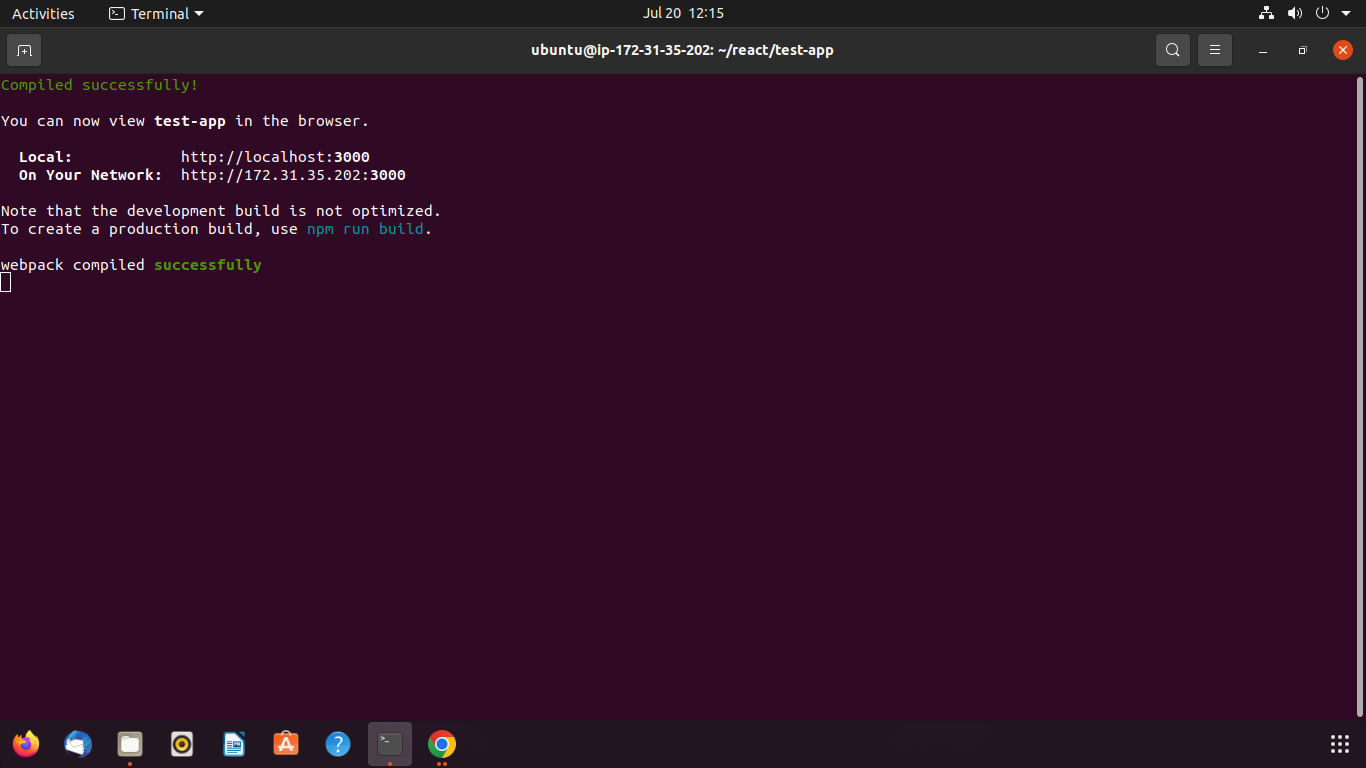
So, to deploy for development environment enter to directory with APP_NAME then run sudo npm start
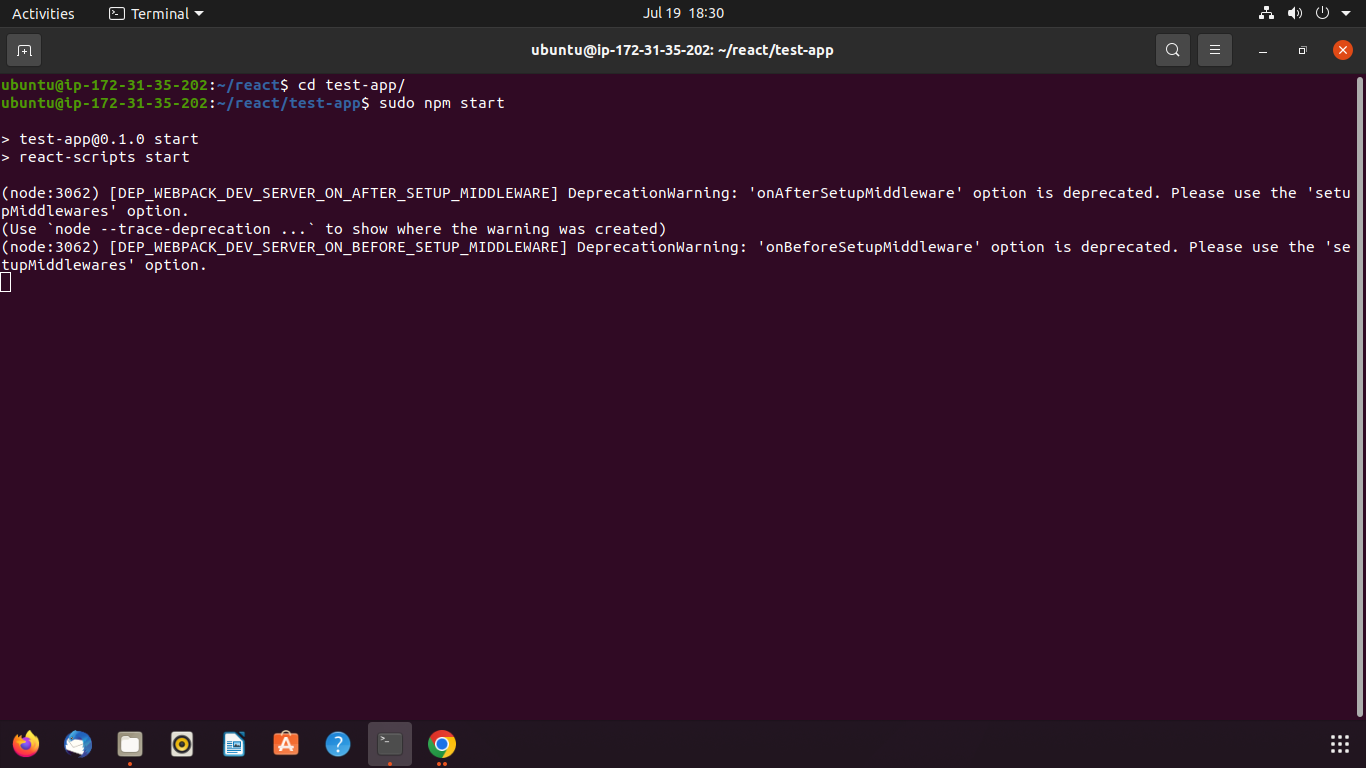


As mentioned in above screenshot, locally it can be accessed by hitting http://localhost:3000 and http://INSTANCE_PRIVATE_IP:3000 but to provide access to developer we have two options:
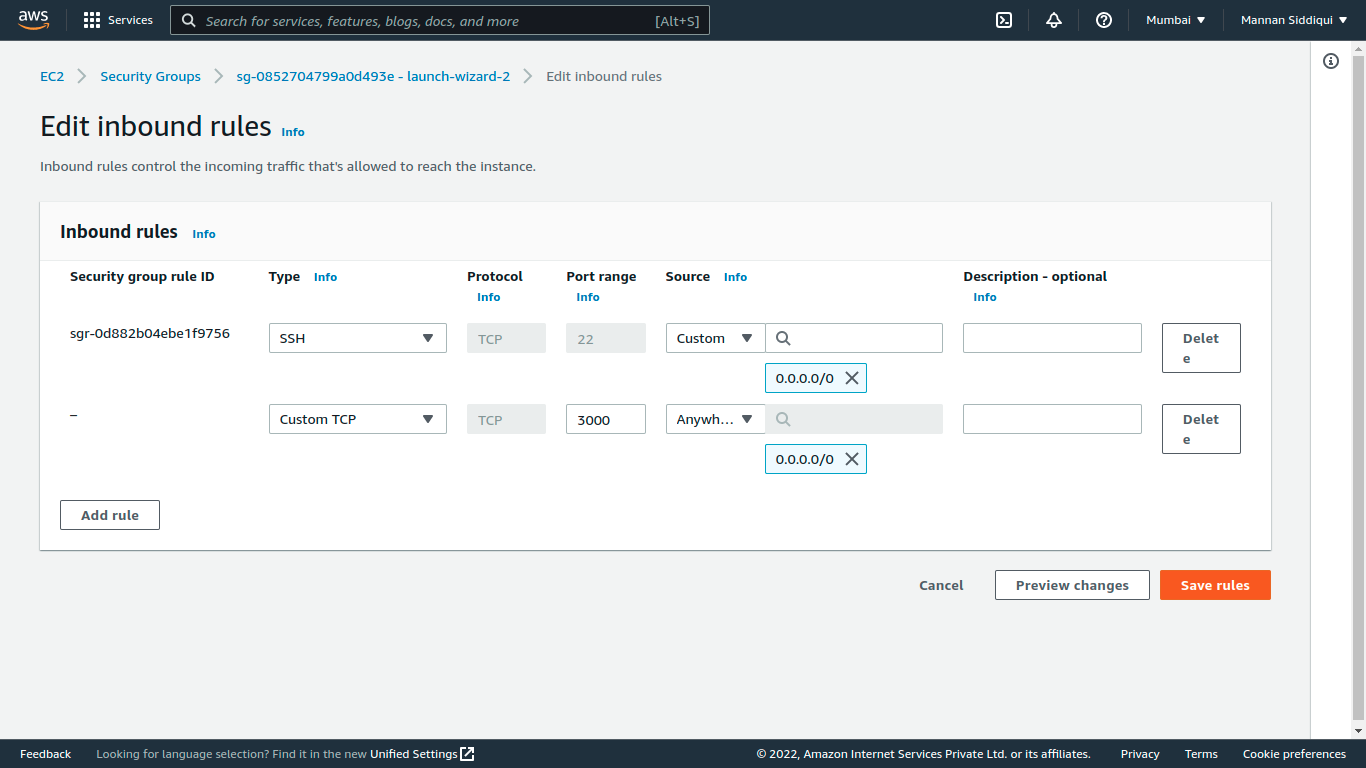
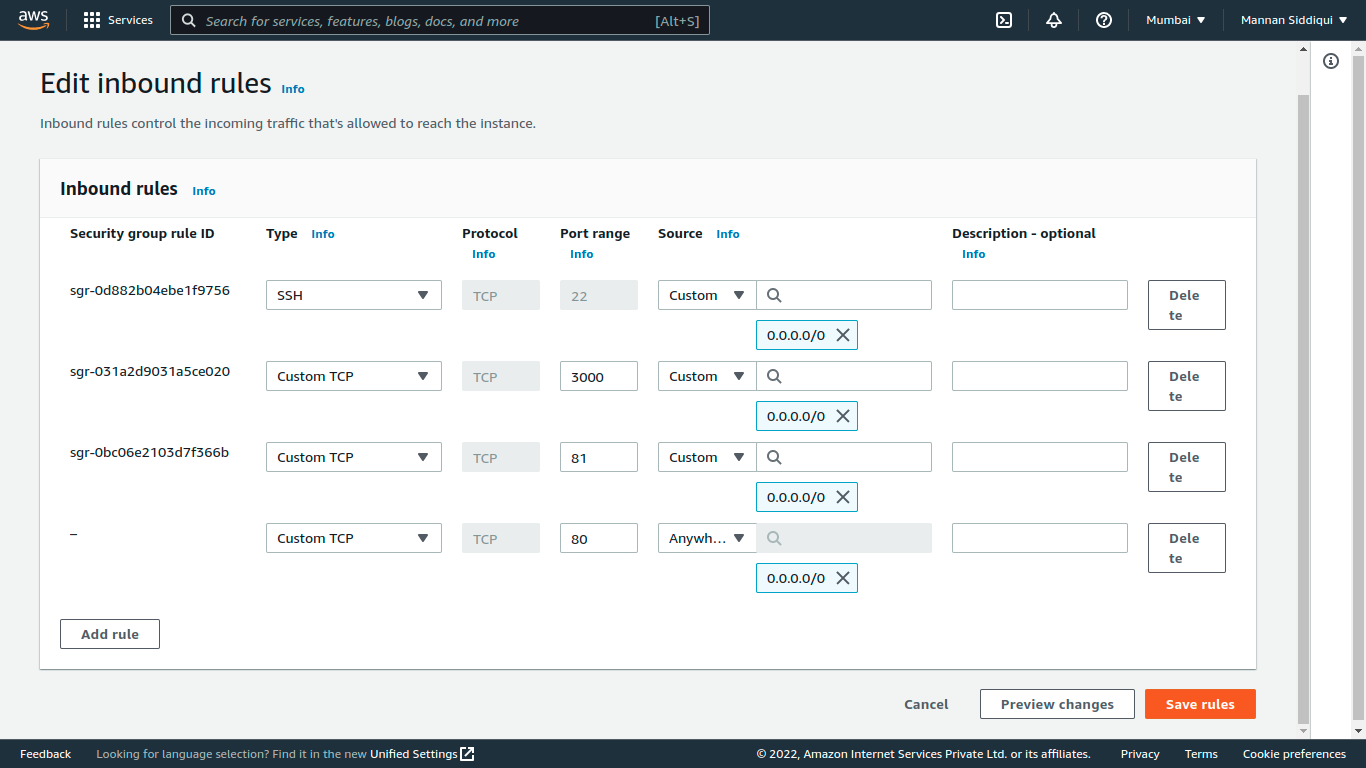
We have to create a rule in security group for port no. 3000 after that it can be accessed using INSTANCE_PUBLIC_IP:3000
For this click Security as show in screenhot below then on secuity group that start from sg-......

Here, click Edit inbound rules then on Add rule

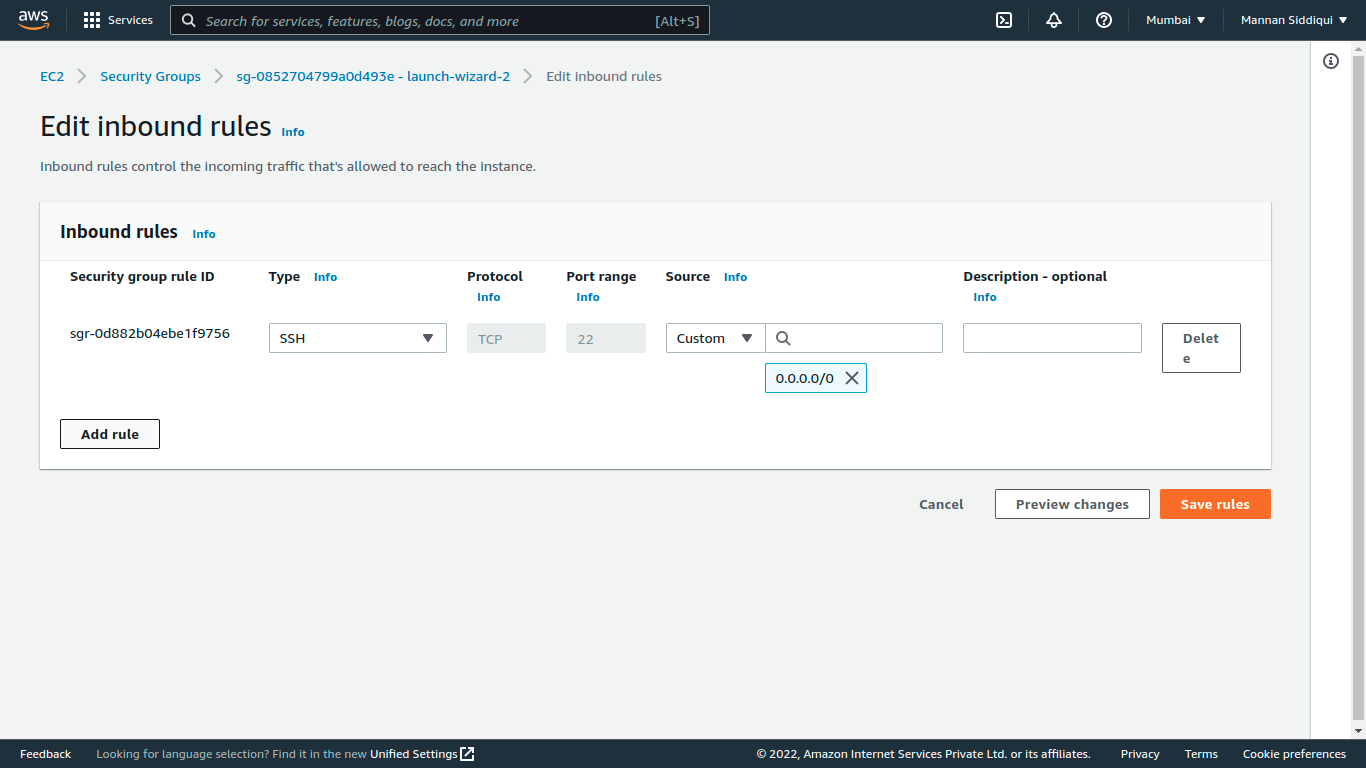
add rule for 3000 port from anywhere i.e. 0.0.0.0/0 then click Save rules
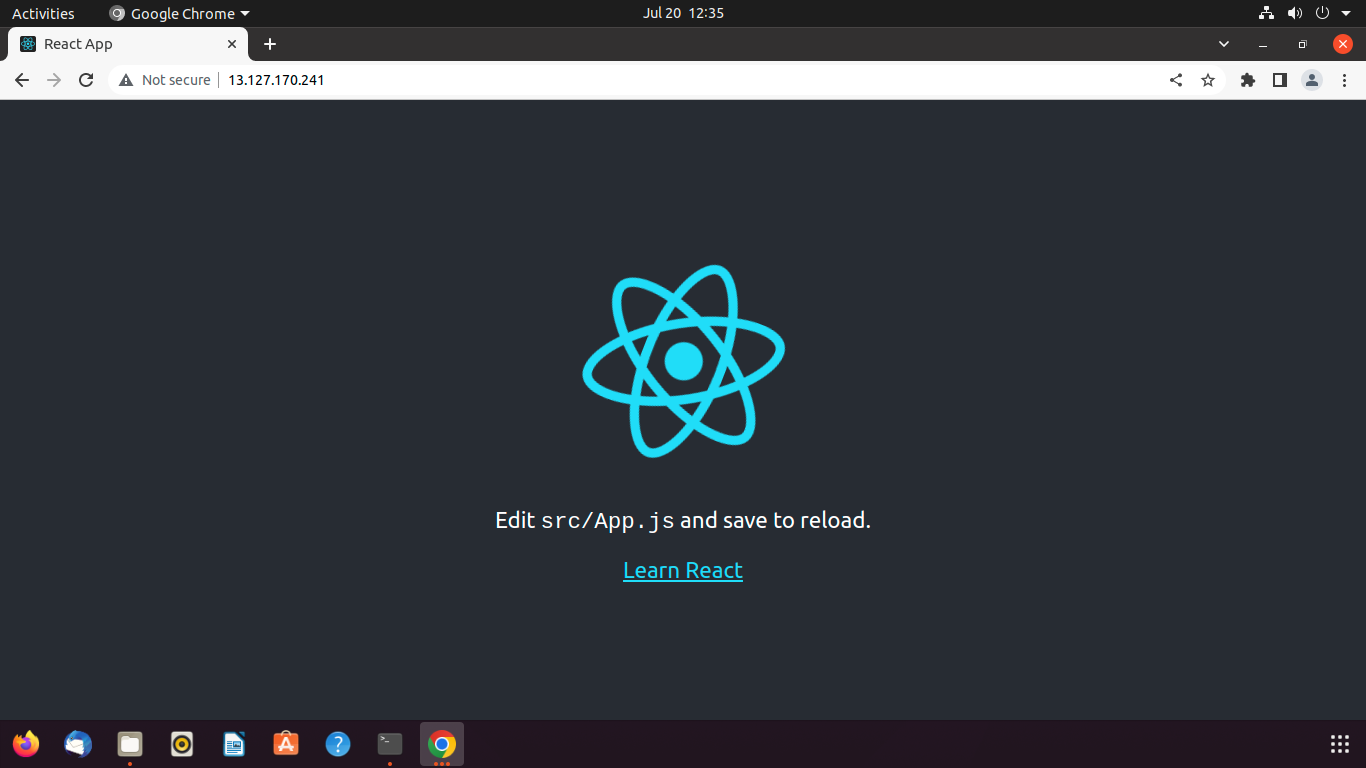
Now try to hit <INSTANCE_PUBLIC_IP>:3000

As you can see we can able to access remotely.
We can use nginx reverse proxy
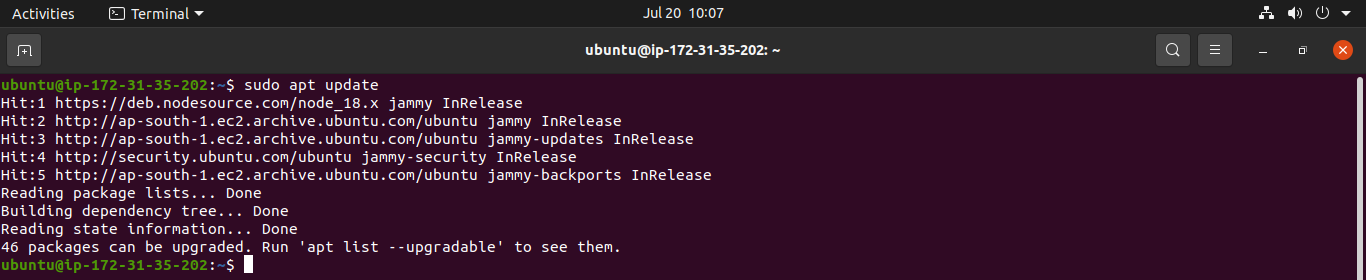
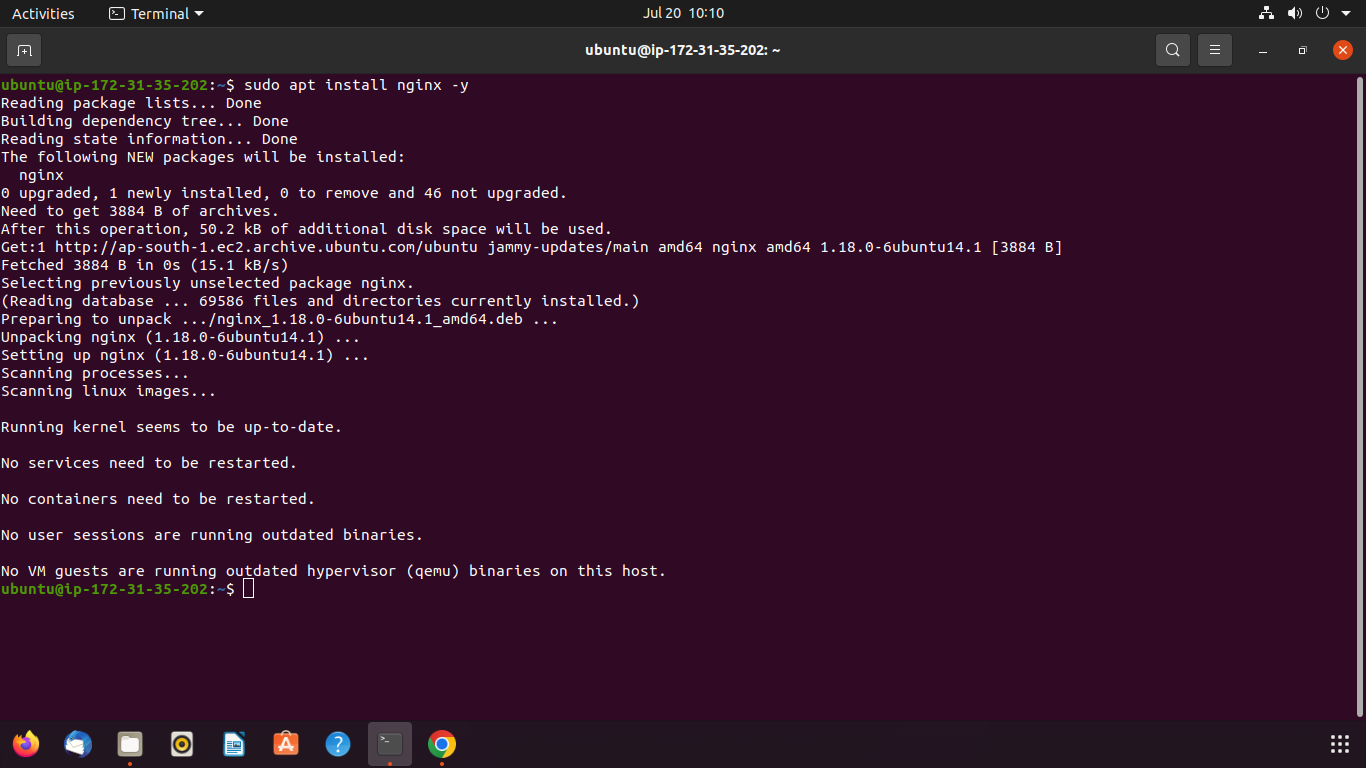
For this, install nginx using sudo apt install nginx -y but before this update the list of packages using sudo apt update
To check nginx is successfully installed or not use nginx -v

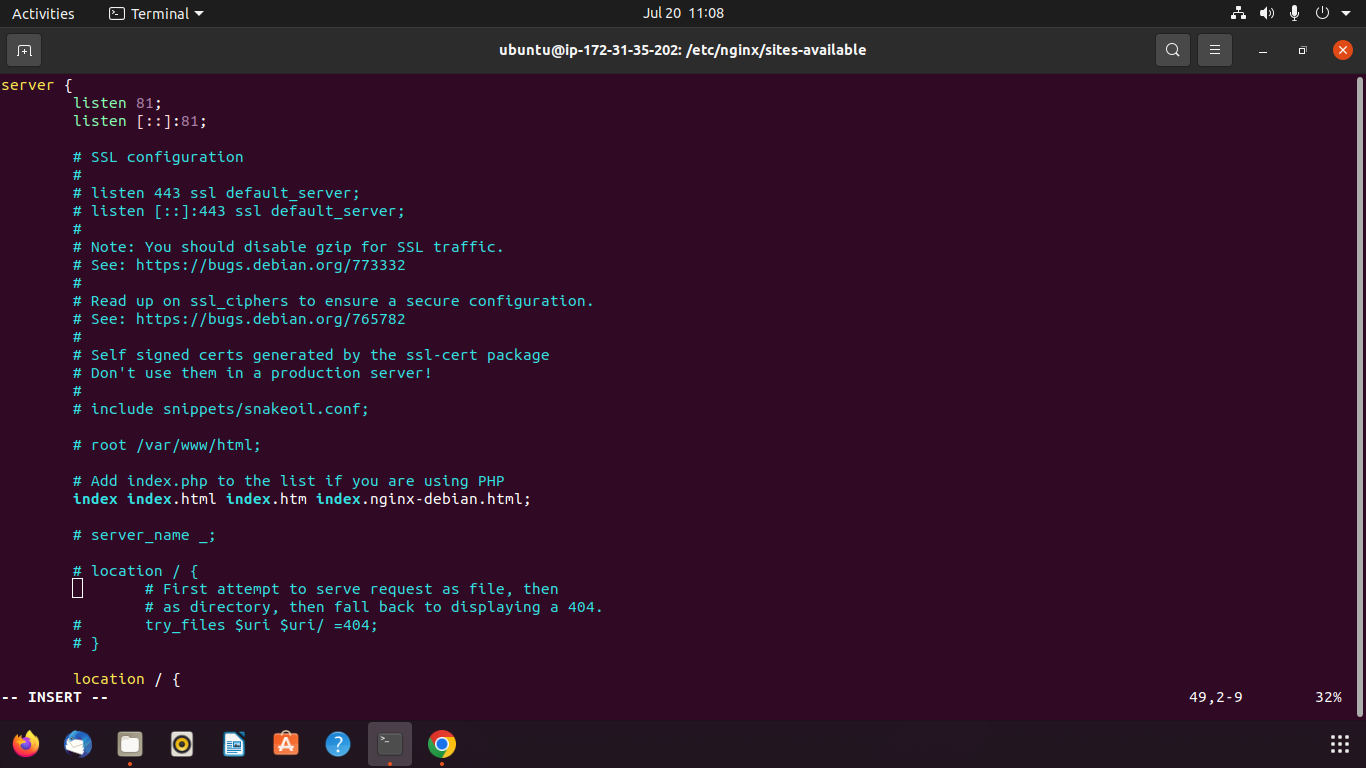
Now, let's do reverse proxy. For this, create a conf file inside /etc/nginx/sites-available/ directory with any name
Here what we will do copy the default conf file with any name then make changes accordingly

Now press i to insert then comment unessary things and add below part in server block then press Esc key and type :wq! to write and quit.
location / {
              proxy_pass http://localhost:3000;
}

Next, let's enable the file by creating a link from sites-available to the sites-enabled directory, which Nginx reads from during startup:

To check that there are no syntax errors in any of your Nginx files, use sudo nginx -t

Time to restart Nginx server using sudo systemctl restart nginx

Before hitting EC2_PUBLIC_IP:81 don't forgot to run sudo npm start to start server for dev env.


Now, let's try to hit EC2_PUBLIC_IP:81

As you can see we are not getting the result one thing we missed is we have not created a firewall rule for port no. 81.
For this navigate to security group attached with instance then click Edit inbound rules then on Add rule after that click Seve rules


As you can see its working fine we are getting results.

Now, to deploy for production environment enter to directory with APP_NAME then run sudo npm run build it will create a build folder.
Copy all files from build directory to /var/www/html/

Again we also have to create firewall rule for port 80 as http works on port 80.
Now, try to hit EC2_PUBLIC_IP:80 or only EC2_PUBLIC_IP